App
User Manual for nPZero SENTIEL and Nanopower App
The Nanopower App lets you connect your newly purchased Nanopower IoT devices right out of the box.
"You'll be up and running in seconds"
Welcome
Before using your nPZero SENTINEL device please read this user manual, the manual can also be downloaded from https://nanopower.store/manuals
The nPZero SENTINEL device
Prepare your phone
|
|
|
Install App
Nanopower is available for download from the App Store and Google Play.
![]()
![]()
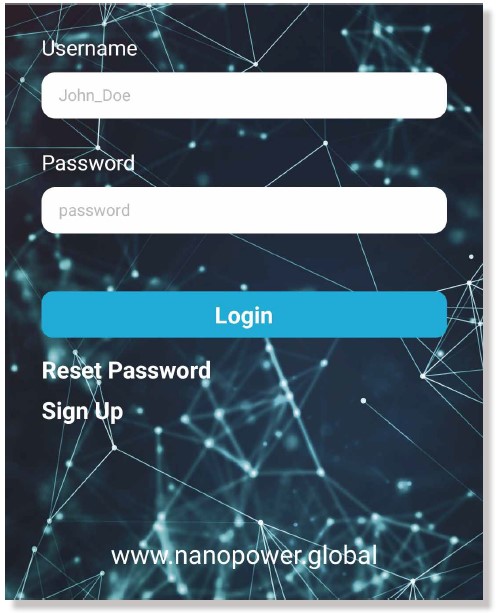
Sign up
Tap Sign Up and fill in the blank fields to register.
Login with your newly created username and password.
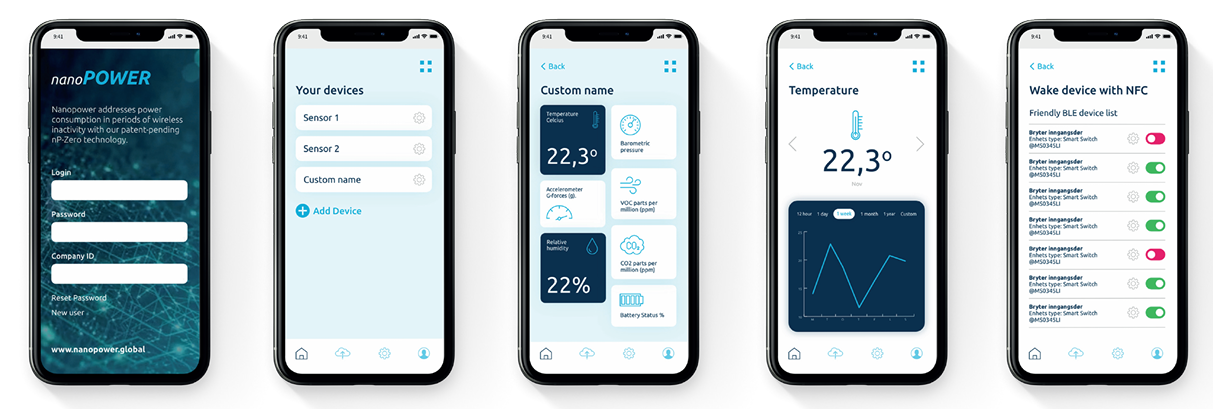
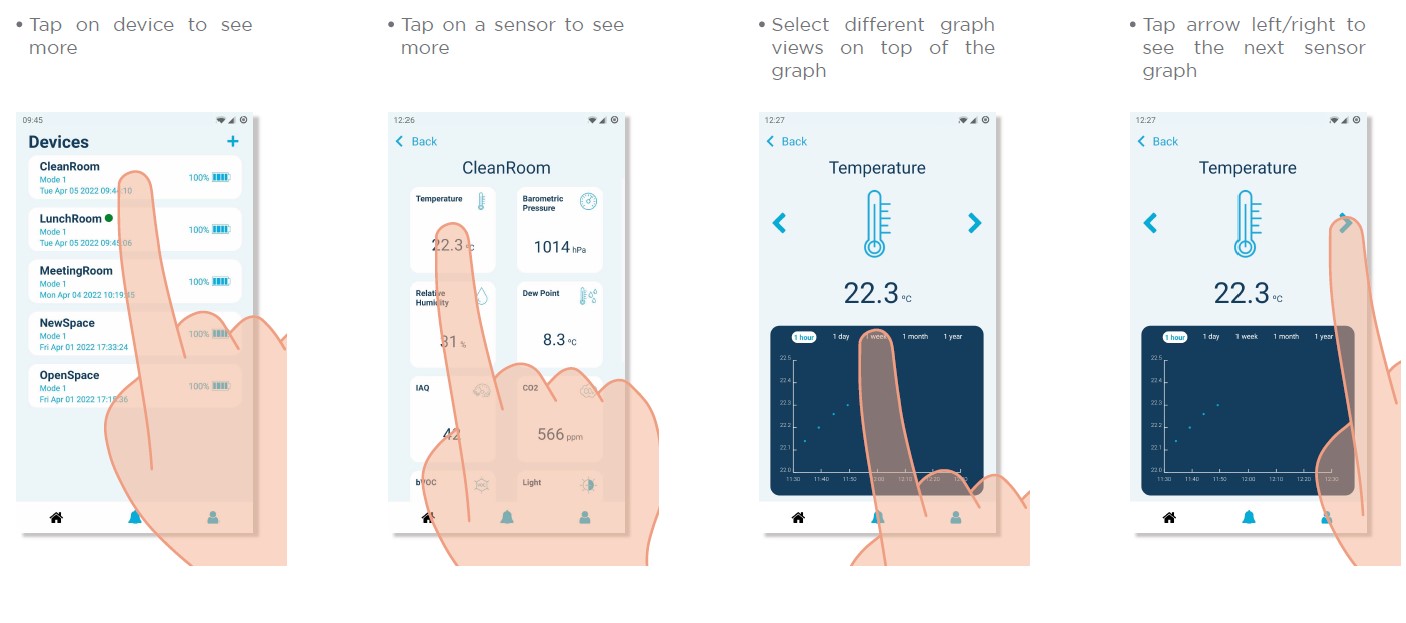
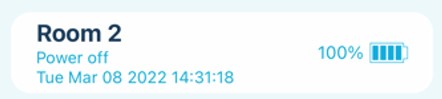
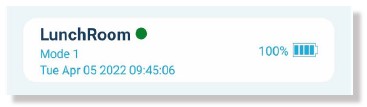
Home
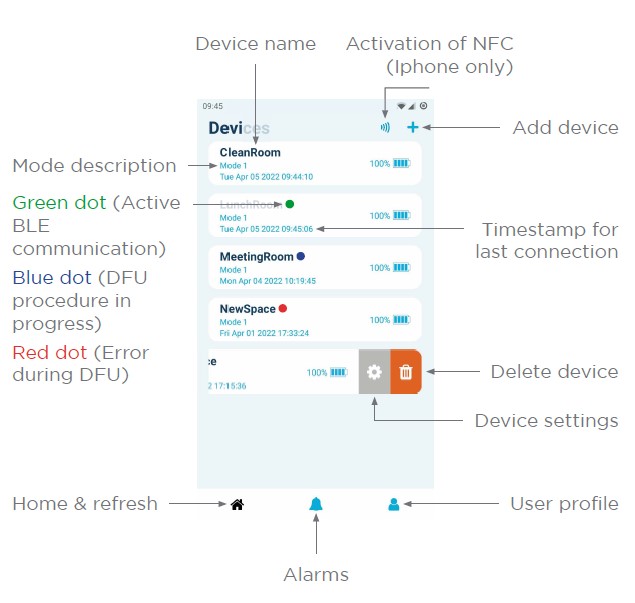
Read device data
NFC connection illustrations
| iPhone | |
|
|
Hold the iPhone in an angle towards the top of the device. |
| Andorid | |
|
|
Hold the back of the Android phone towards the top of the device.* * Depending on phone brand and model, the location of the phones NFC antenna may have a different location then illustrated. Please see the phone user manual for exact NFC antenna location. |
Add device to your account
-
Tap +
-
Hold the phone according to the "NFC connection illustrations"
-
Follow the instructions on the screen (iPhone users)
-
Give the device a name and tap Add device. The device is now assigned to your user account
Power on device
- Tap
 (iPhone users)
 -
Hold the phone according to the "NFC connection illustrations"
-
Hold for at least 3 secounds
-
Follow the instructions on the screen (iPhone users)
-
The device will now boot in Mode 1. Every 5 minutes the device is ready to connect with the app. The connection is for short periods and indicated by
 . See Modes to read more.
On demand communication
The device connects with the app at intervals, e.g., every 5 minutes (see Modes). Communication between these intervals can be perfomed by following these steps.
- Tap (iPhone users)
-
Hold the phone according to the "NFC connection illustrations"
-
Follow the instructions on the screen (iPhone users)
-
After the phone is removed, the device wakes up and is ready to communicate with app.
Modes
|
Mode description |
Mode 1 Indoor Enviroment Sensor |
Mode 2 Offline Data Logger |
Mode 3 Logistics Tracking |
Power Off |
|
BLE communication |
Every 5 minutes, and when triggered by NFC or alarms |
When triggered by NFC |
For Gatways only Every 5 minutes, and when triggered by NFC or alarms |
Never
|
|
Sensor sampling rate |
|
|
|
|
|
Accelerometer, 3-axis |
Every 0.6 seconds
Goods also writes to memory every 5 minutes |
Every 0.6 seconds |
Every 0.6 seconds |
Never |
|
Temperature |
Every 4 seconds
|
Every 4 seconds |
Every 4 seconds |
Never |
|
Other |
Every 5 minutes. Write to memory every 5 minutes Rh, VOC, CO2 and IAQ, Bp, Light. Note: Gyro and magnetometer is not written to memory every 5 minutes |
Every 60 minutes. |
Every 5 minutes. |
Never |
|
Alarms |
Yes, if enabled |
Yes, if enabled |
Yes, if enabled |
No |
|
Memory |
|
|
|
|
|
Erased after BLE communication |
Yes |
Yes |
Yes |
|
|
Rollover/overwrite time series |
No |
No |
Yes |
|
|
Rollover/overwrite alarms |
No |
No |
No |
|
Device Settings
Slide device to left, tap ![]()
- Device name and additional information can be changed at any time, tap Save after making changes.
- Device Group indicate if the device is shared with other groups.
Select Mode
- Slide device to left, tap
 > Select Mode
 - Tap 1-3 or
 to select mode > Save
 - The device will change mode next time it connects to the app. Until the mode is changed, the mode description states Current mode -> Desired mode e.g., Mode 1 -> 2.
- Note: Next interval for communication is dependent on the current mode. See Modes or On demand communication for manual trigger of communication.
Alarm Settings
If a value is outside the defined alarm settings, the device will store that value as an alarm.
- Slide device to left, tap > Alarm Settings
- Activate the alarm and drag the slider(s) to set threshold. Tap Save.
- The device will change alarm settings next time it connects to the app. Until the settings are applied the mode description states AS.
Note: Next interval for communication is dependent on the current mode. See Modes or On demand communication for manual trigger of communication.
View Alarms
New alarms is indicated by red dot (with numbers). ![]()
Tap ![]() to view alarm log. Hold on a single alarm to acknowledge or tap
to view alarm log. Hold on a single alarm to acknowledge or tap ![]() to acknowledge all alarms.
to acknowledge all alarms.
DFU - Device Firmware Update
-
Slide device to left, tap
> Firmware Update > Open Firmware Download Page -
Tap on the most recent zip file to download to the phone.
-
Tap Select Firmware Zip File
-
Navigate to the location where the zip file is stored on phone
-
Tap on the zip file > Update Device Firmware.
-
The device will start the DFU process next time it connects to the app. Until FW is updated, the mode description states DFU.
-
During the next connection, indicated by
(receiving all information over BLE), followed by a  (executing DFU). After a few seconds, the device will restart and connect with the app again, indicated by . The device is now updated.
![]() indicated failed DFU process, repeat the procedure.
indicated failed DFU process, repeat the procedure.
Note: Next planned communication is mode dependent. See Modes or On demand communication for manual trigger of communication.
Support
Submit a support ticket at https://nanopower.store/contact_us
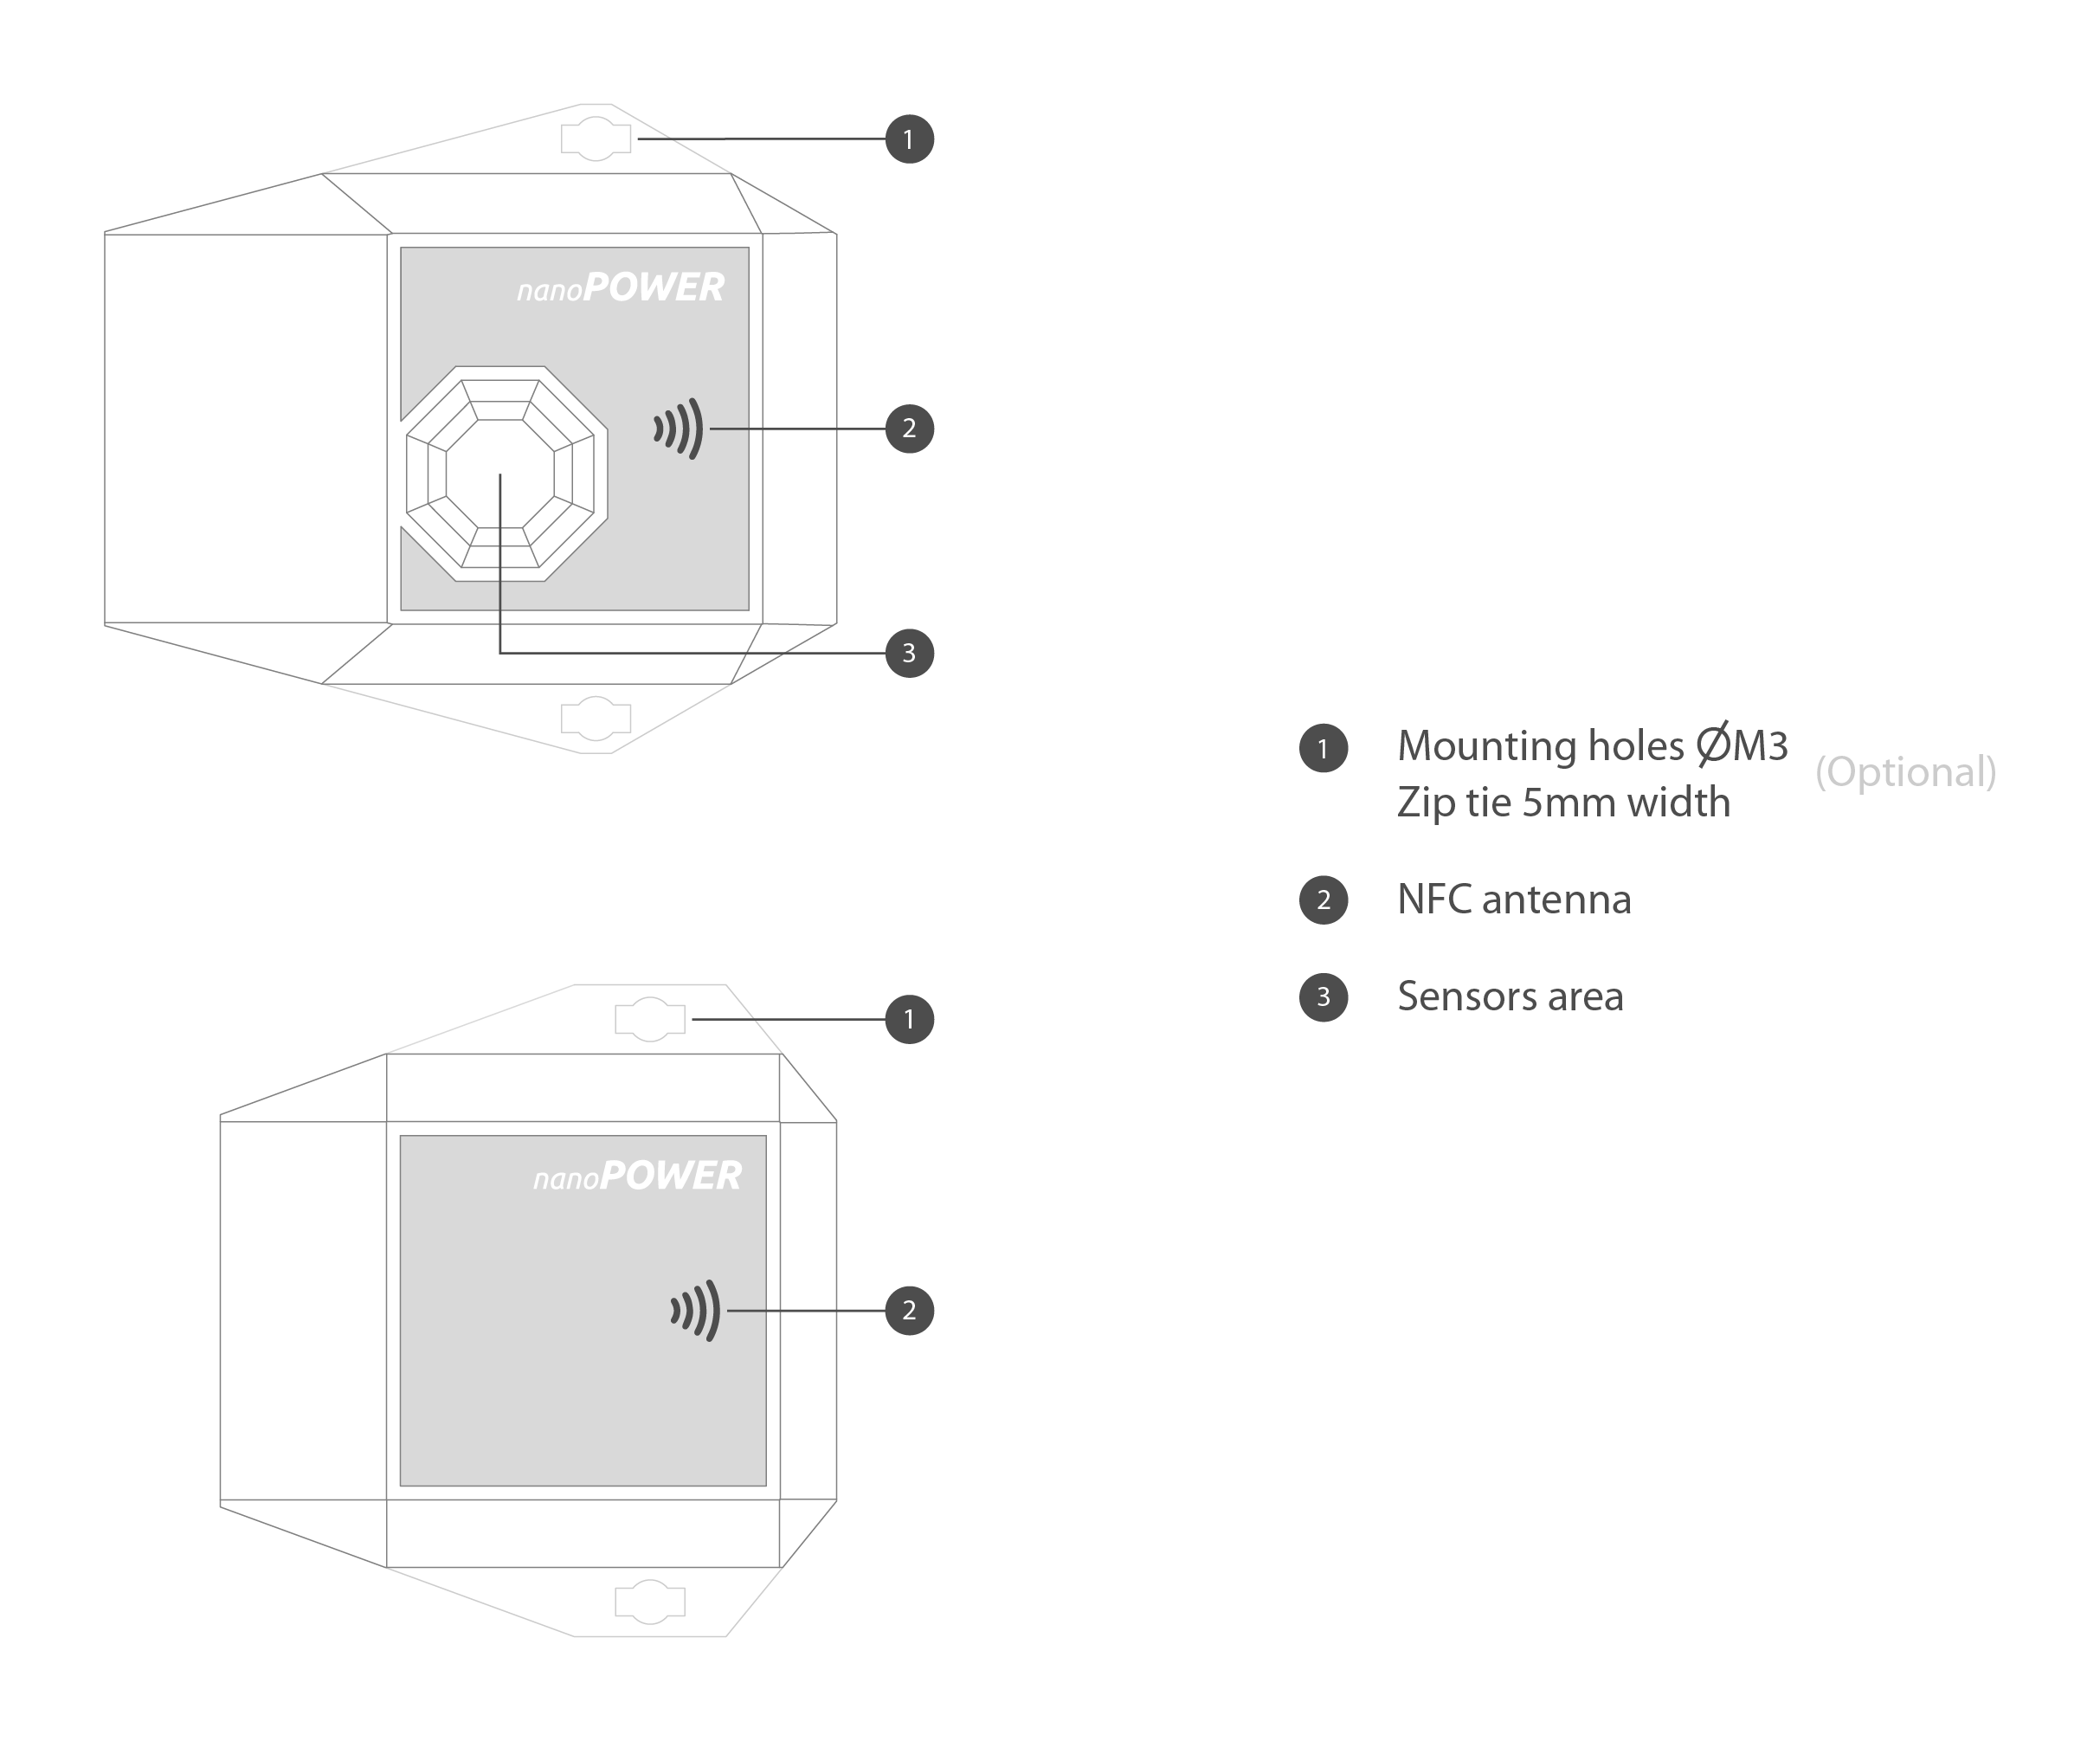
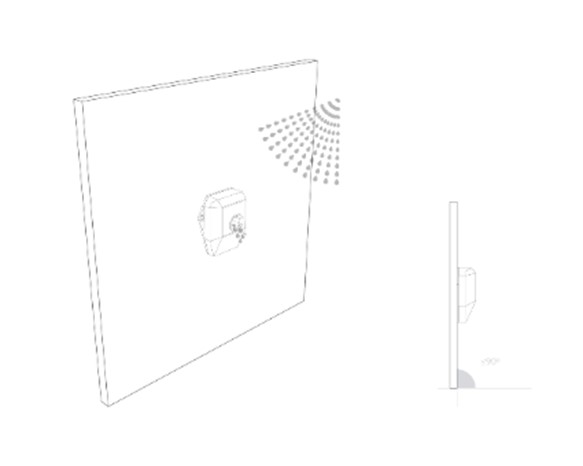
Installation
The nPZero SENTINEL series is designed to be attached to other flat surfaces and objects. Ensure that both surfaces are clean and use screws / tie wrap or double-sided tape to fasten the device.
Indoor installation at any angle.
Outdoor installation on a vertical and weather protected area to ensure sufficient drainage of water.
The sensor for IQA, CO2, and VOC estimation can report erroneous values if exposed to direct sunlight in the sensor area, condensing enviroment, and wind/fst change in air pressure. The sensor needs time to adjust to its enviroment and is ment for installtion in one location.
nPZero, NPZero SENTINEL are trademark or registered trademark of Nanopower AS, Andøyfaret 15, 4623 Kristiansand, Norway
https://www.nanopower.global All rights reserved.
Android ™ is a trademark of Google Inc.
The Bluetooth® word marks and logo are registered trademarks owned by Bluetooth SIG, Inc.
The N-Mark is a trademark or registered trademark of NFC Forum, _Inc. in the US and other countries
"Google Play and the Google Play logo are trademarks of Google LLC."
Other companies and product names mentioned in this book may be trademarks of their respective owners.
Great emphasis has been placed on the information in this book being as accurate and correct as possible. Nanopower is not responsible for any printing or typing errors.